In recent times, I have seen a lot of searches going around this heading “How to send an email attachment using Microsoft Flow” over the web. Yes, I am not an exception to it. But I could not find detailed documentation that explains the right steps to be followed and works for all the cases.
So, I just thought of making one. In this blog post, I have tried to cover all the possible scenarios like support for multiple attachments, support for all attachment formats and nevertheless with the minimal steps.
Scenario
Consider a scenario, whenever an item is created in the SharePoint List with an attachment(s). The Microsoft Flow would automatically pick that event and send the attachments to the configured email address. The attachments can be of any numbers and formats.
I have considered the source endpoint as SharePoint List, but you can have any endpoint as a source trigger. Make sure the source endpoint which you choose has a trigger in Microsoft Flow.
Pre-requisites
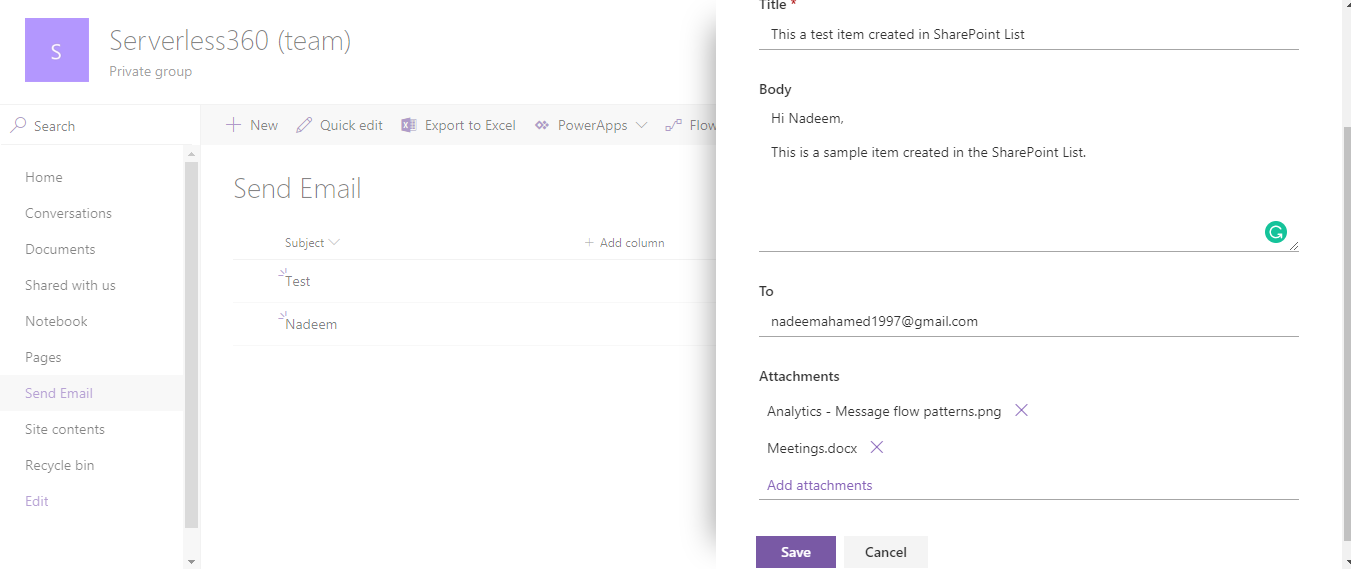
In order to build this project, we need to have a SharePoint List and a Microsoft Flow. Here, I assume you know how to create a SharePoint List. I have created a SharePoint List named Send Email. The list contains the following fields/column:
- Title
- Body
- To
- Attachments
Steps to be followed to create a Microsoft Flow Project
Step 1
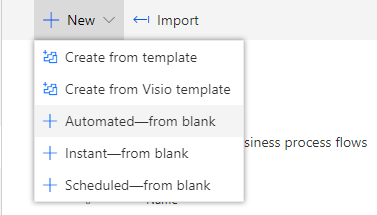
Here we go, the first step is to create a “New Project” by clicking on the “NEW” button on the top header and select “Automated – from blank” from the list of options in the drop-down menu.
Step 2
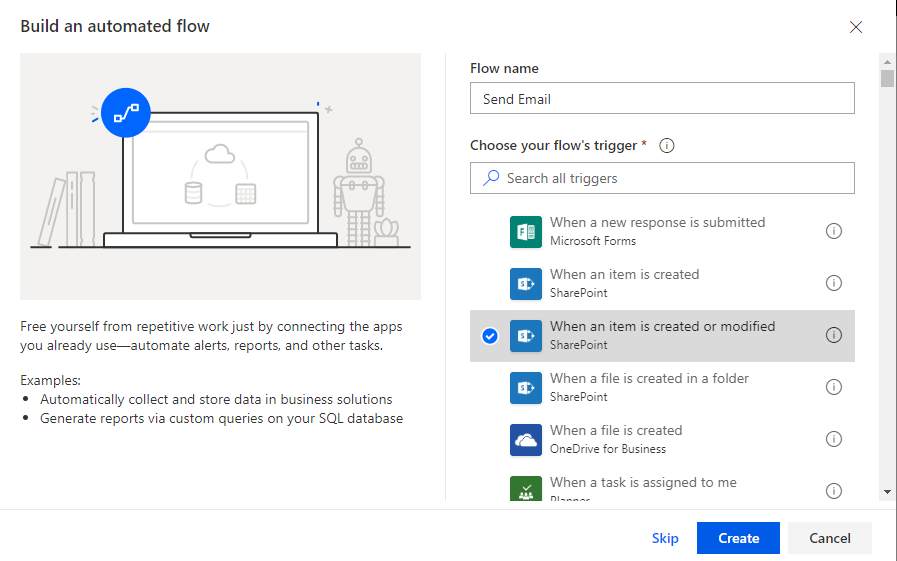
Now, a new window would pop-up with the following fields.
- Flow Name – “Your Customized Name”
- Flow Trigger – SharePoint trigger – When an item is created
Step 3
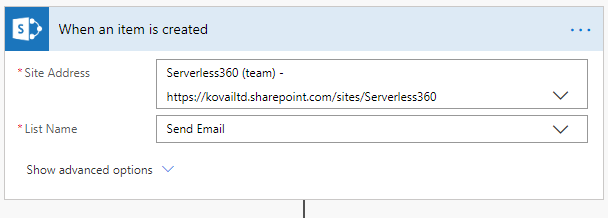
Fill the flow trigger fields with the following parameters:
- Site Address – “The site URL where your SharePoint List resides”
- List Name – Send Email
Step 4
Now, add an “Initialize Variable” action and fill the following fields as follows:
- Name – attachments
- Type – Array
Here, we have initialized an array variable which will be used to store the value of the attachment.

Step 5
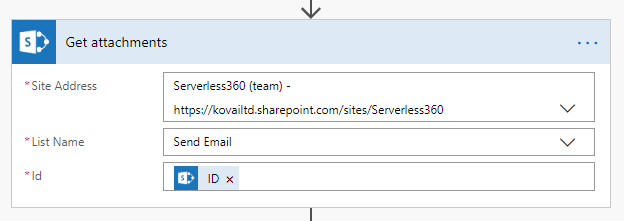
Add a “Get Attachments” action which will useful to return the list of attachments for the specified list item. You can add a “Get attachment content” step and use the “File identifier” property returned by this action to get to the contents of the file.
Fill the action fields as follows:
- Site Address – “The site URL where your SharePoint List resides”
- List Name – Send Email
- Id – Choose from Dynamic Content “ID”
Step 6
Now, let us make use of this latest action available in the Microsoft Flow. Add “for each” action and fill the following fields as follows:
- Select an output from previous steps – Add Dynamic content – “Body”
Step 7
Within the For Each action add the “Get Attachment Content” action and fill the fields as below:
- Site Address – “The site URL where your SharePoint List resides”
- List Name – Send Email
- Id – Use Dynamic content – “ID”
- File identifier – Use Dynamic content – “Id”
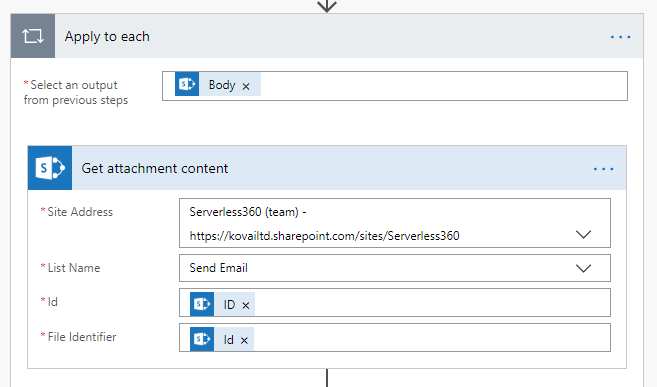
In this case, both the fields Id and file identifier uses the value as the same name as Id. But Id field uses the Dynamic content under When an item is created section. Whereas, File identifier uses the Dynamic Content under Get attachments section.
Step 8
Now, underneath “Get attachment content” action, add another action – “Append to array variable”. This action appends all the attachment value to the array variable which we initialized before. Fill the fields as follows:
- Name – attachments
- Value – {
“Name”: “Use Dynamic content – Display Name”
“ContentBytes”: “Add Expression – body(‘GetContent’).$content”
}
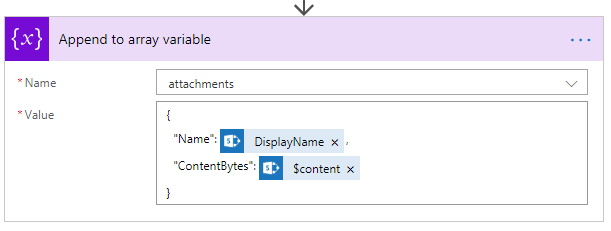
This action is the trickiest part of our entire flow. The ContentBytes parameter holds the actual attachment.
Step 9
Now, add an action – send an email out of the For Each loop. Fill the fields as below:
- To – Use Dynamic Content – To
- Subject – Use Dynamic Content – Subject
- Body – Use Dynamic Content – Body
- Attachments – Use Dynamic Content – attachments
Note: In the attachments field, switch the option from being entered as a detailed array value to an entire array value.
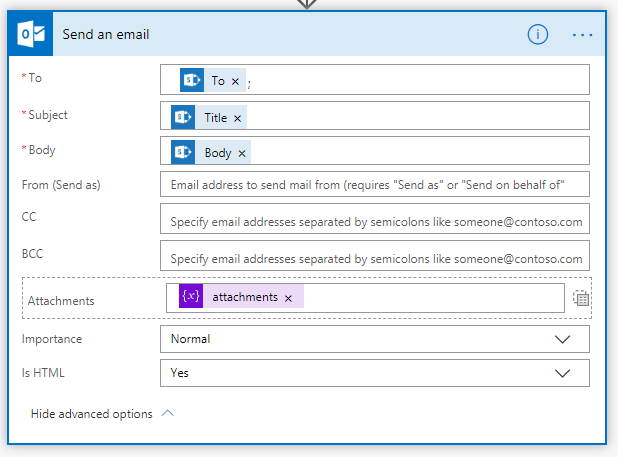
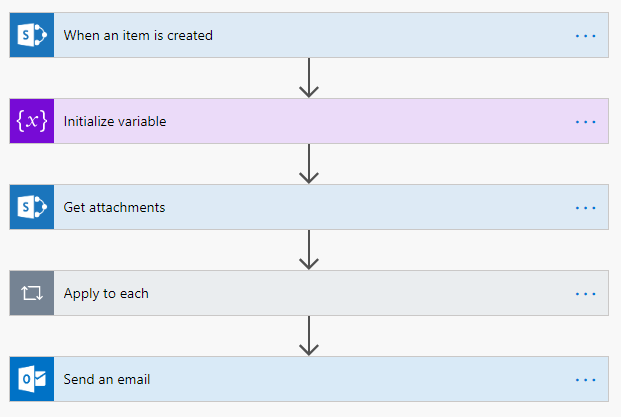
So, in the end the entire flow should look something like the below image.
Test the Flow
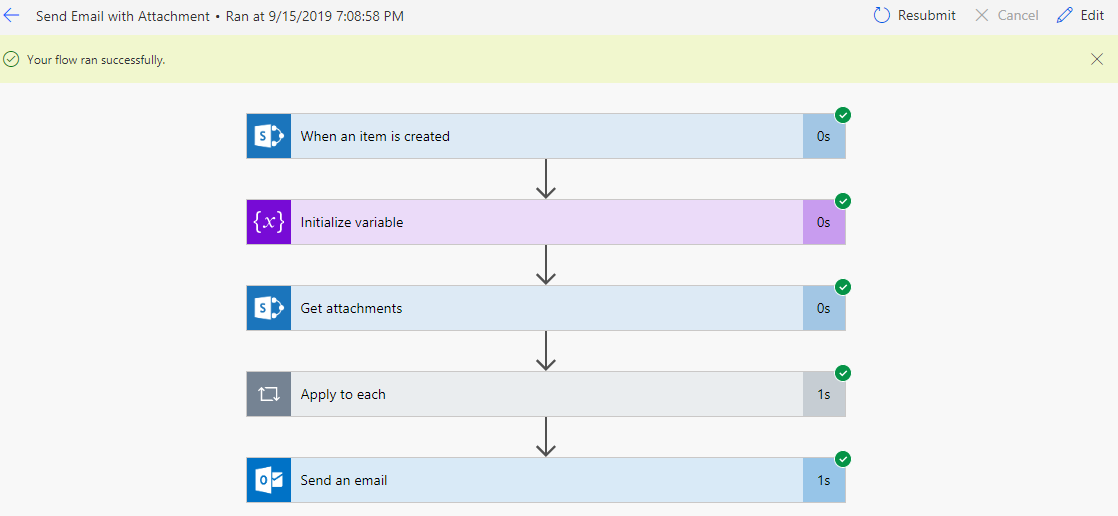
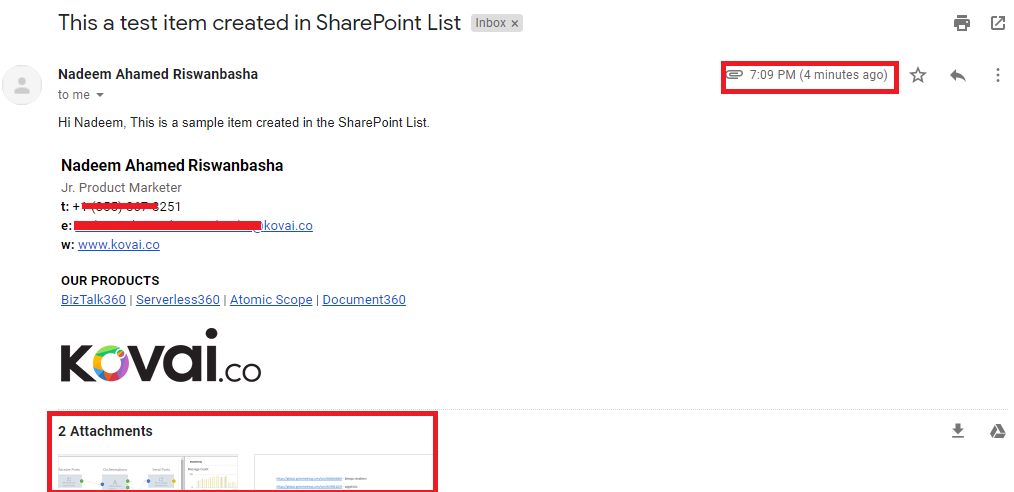
Let us now test the entire flow. To trigger the action, add an item in the SharePoint List with multiple attachments. Now, you should see the flow has run successfully and a new email that pops in your inbox with the attachments.
Now, let us check our email inbox if we have received the attachments as desired.
Conclusion
In this blog, we have seen how to send an email attachment using Microsoft Flow. I hope you have got a clear understanding of each step that we used in our flow. Try it out and do leave your comments below. Happy Learning!
Community Content
If are interested in learning on how to properly extract an email attachment using Microsoft Flow. Learn here.
