Authorization is the process of defining access rights/privileges to resources, which is connected to information security in general and computer security in particular, as well as access control. Individual files or an item’s data, computer programs, computer devices, and computer application capabilities are all examples of resources. Computer users, computer software, and other computer hardware are examples of customers.
Before going further, it should be clear that Authentication is different from Authorization.
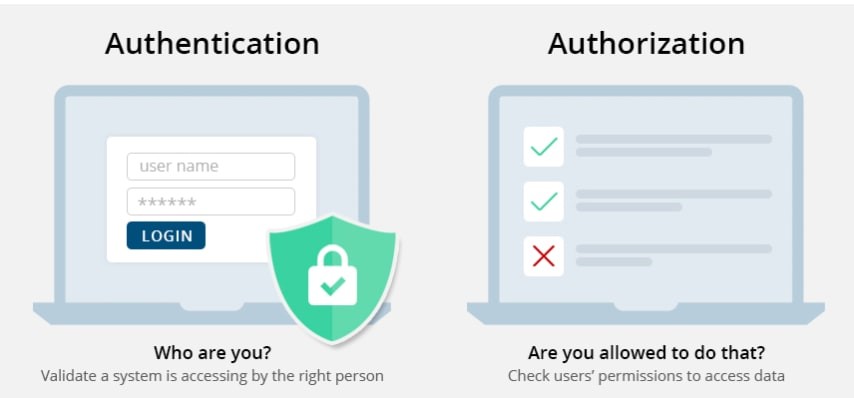
So far, we have seen what is Authorization but why? It makes the user to restrict from the resources that they are not allowed to and enable the authorized one to access it.
In definition “Authorization is a function of the policy definition phase, which comes before the policy enforcement phase, in which access requests are accepted or denied depending on the authorizations that have been defined previously”.
Types of Authorization:
There are four types of Authorization and they are
-
-
- API Keys
- Basic Auth
- HMAC
- OAuth
-
API Keys:
The API key is a long string that is typically included in the request URL or header. It is mostly used to identify the person who is performing the API call (authenticating you to use the API). It might also be associated with a specific app that you register.
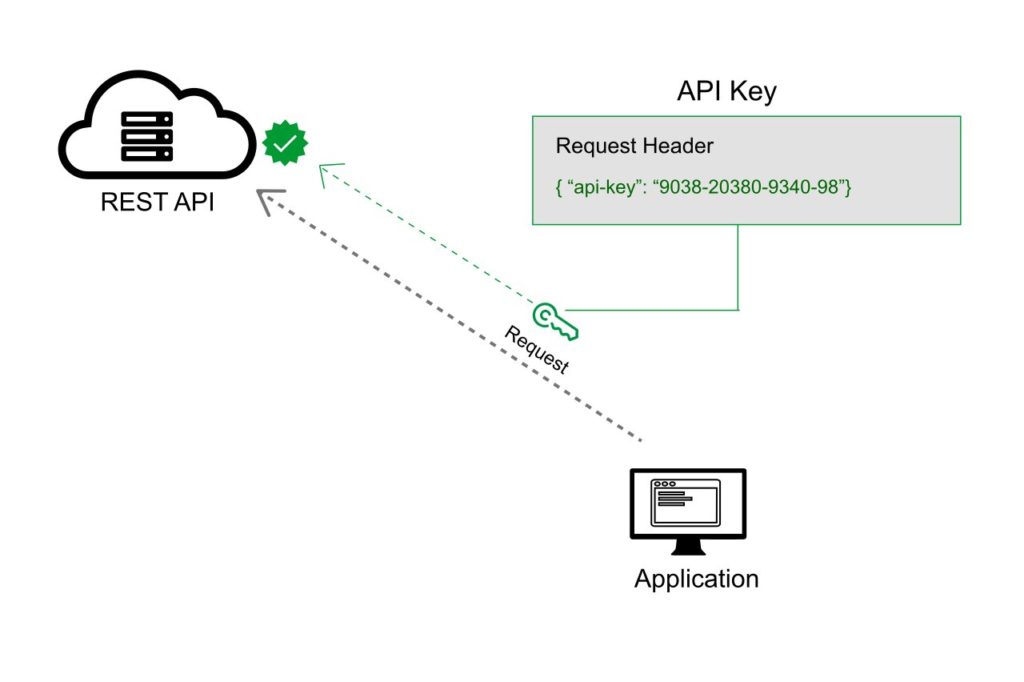
You may receive both public and private keys from APIs. The public key is normally included in the request, whereas the private key is used primarily for server-to-server communication and is treated more like a password. When you log in to some API documentation sites, your API key is automatically supplied into the sample code and API Explorer.
Basic Auth:
Basic Auth is another type of authorization. The sender inserts a username: password into the request header using this way. Base64 is an encoding technique that turns the login and password into a set of 64 characters to ensure secure transmission. APIs that support Basic Auth will also support HTTPS, which encrypts the message content within the HTTP transport protocol. (Without HTTPS, hackers could easily decipher the username and password.) The API server decrypts the message and checks the header when it receives it. It chooses whether to accept or refuse the request after decoding the string and assessing the username and password. HTTP Basic authentication (BA) implementation is the simplest technique for enforcing access controls to web resources because it does not require cookies, session identifiers, or login pages; rather, HTTP Basic authentication uses standard fields in the HTTP header.
Here’s an example of a Basic Auth in a request header:

In Postman, you can configure Basic Authorization by clicking the Authorization tab, selecting Basic Auth from the drop-down selector, and then typing the username and password on the right of the colon on each row.
HMAC:
HMAC stands for Hash-based message authorization code and is a stronger type of authentication, more common in financial APIs. With HMAC, both the sender and receiver know a secret key that no one else does. The sender creates a message based on some system properties (for example, the request timestamp plus account ID).
The message is then encoded by the secret key and passed through a secure hashing algorithm (SHA). (A hash is a scramble of a string based on an algorithm.) The resulting value, referred to as a signature, is placed in the request header.
When the receiver (the API server) receives the request, it takes the same system properties (the request timestamp plus account ID) and uses the secret key (which only the requester and API server know) and SHA to generate the same string. If the string matches the signature in the request header, it accepts the request. If the strings don’t match, then the request is rejected.
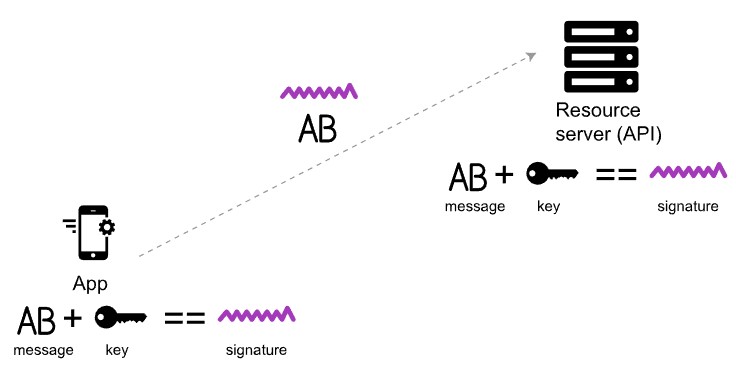
The important point is that the secret key (critical to reconstructing the hash) is known only to the sender and receiver. The secret key is not included in the request. HMAC security is used when you want to ensure the request is both authentic and hasn’t been tampered with.
OAuth:
This approach relies on an authentication server to communicate with the API server to grant access. You often see OAuth 2.0 when you’re using a site and are prompted to log in using a service like Twitter, Google, or Facebook. There are a few varieties of OAuth — namely, “one-legged OAuth” and “three-legged OAuth.” One-legged OAuth is used when you don’t have sensitive data to secure. This might be the case if you’re just retrieving general, read-only information.
In contrast, three-legged OAuth is used when you need to protect sensitive data. Three groups are interacting in this scenario:
- The authentication server
- The resource server (API server)
- The user or app
Here’s the basic workflow of OAuth 2.0:
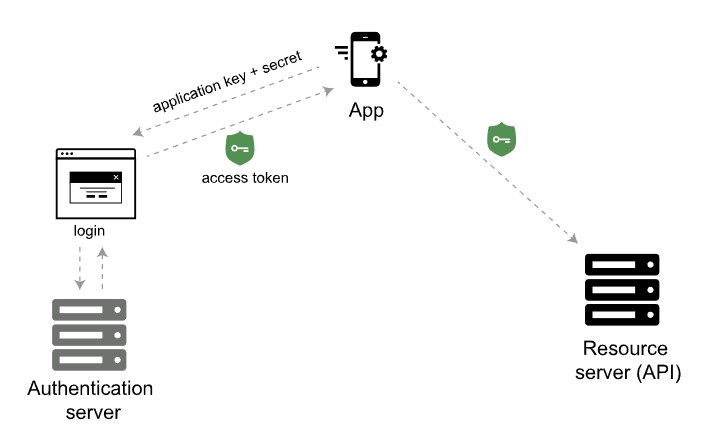
First, the consumer application sends over an application key and secret to a login page at the authentication server. If authenticated, the authentication server responds to the user with an access token.
The access token is packaged into a query parameter in a response redirect (302) to the request. The redirect points the user’s request back to the resource server (the API server).
The user then makes a request to the resource server (API server). The access token gets added to the header of the API request with the word Bearer followed by the token string. The API server checks the access token in the user’s request and decides whether to authenticate the user.
Different Approaches of Authorization in ASP.NET Core:
Microsoft provides quite a lot of approaches to authorize the user. Some of main approaches are
-
-
- Simple Authorization
- Role Based Authorization
- Claims Based Authorization
- Policy Based Authorization
-
Simple Authorization:
In ASP.NET Core Authorize Attribute [Authorize] is apply to an action to enable Authorization for that endpoint. For eg:
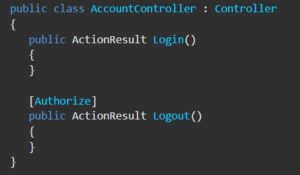
You can also use the Allow Anonymous attribute [AllowAnonymous] to allow access by non-authenticated users to individual actions.
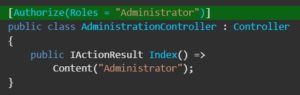
Role Based Authorization | RBAC:
Role Based Authorization also known as Role Based Access Control. When an identity is created it may belong to one or more roles. For example, Vijay may belong to the Administrator and User roles while Simbu may only belong to the User role. Roles can be assigned or set in the Claims of the JWT access token created at the time of login. We will see how to set the Role in Claims in later part.
The Role Checking is done with the Authorize Attribute.
Claims Based Authorization:
Claim Based Authorization also known as Claim Based Access Control. A claim is a name value pair that represents what the subject is, not what the subject can do. For example, you may have a driver’s license, issued by a local driving license authority. Your driver’s license has your date of birth on it. In this case the claim name would be “DateOfBirth”, the claim value would be your date of birth, for example 8th June 1970 and the issuer would be the driving license authority.
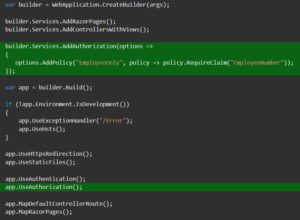
To add Claim, navigate to program.cs and add the following highlighted lines.
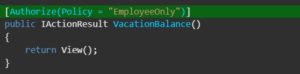
And in Controller file specify the Policy Name you just configured in program.cs file.
Policy Based Authorization:
An authorization policy consists of one or more requirements. A policy can contain any conditions which authorize the user on satisfying the condition.
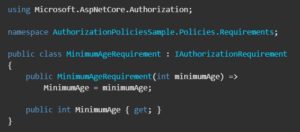
First, we need to create a simple Policy which implements IAuthorizationRequirement Interface.
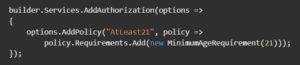
Then set the policy in Program.cs file as below.
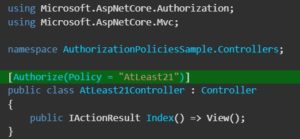
Now add the policy to the controller that you want to protect from the users who are not authorized.
So, that is the simplest example of implementing policy based authorization.
Setting up Simple Application:
So far you have learned about different authorization techniques and their implementation. Now get ready to make your hands dirty on code. I’m going to show you the implementation of Role Based Authorization by creating a simple ASP.NET Core Web API project.
Open your CMD or PowerShell and create a new ASP.NET Core Web Api project.

Open the Project in Visual Studio Code or Visual Studio. I’m not going to show the steps of creating JWT access token and authentication since that would be out of our scope.
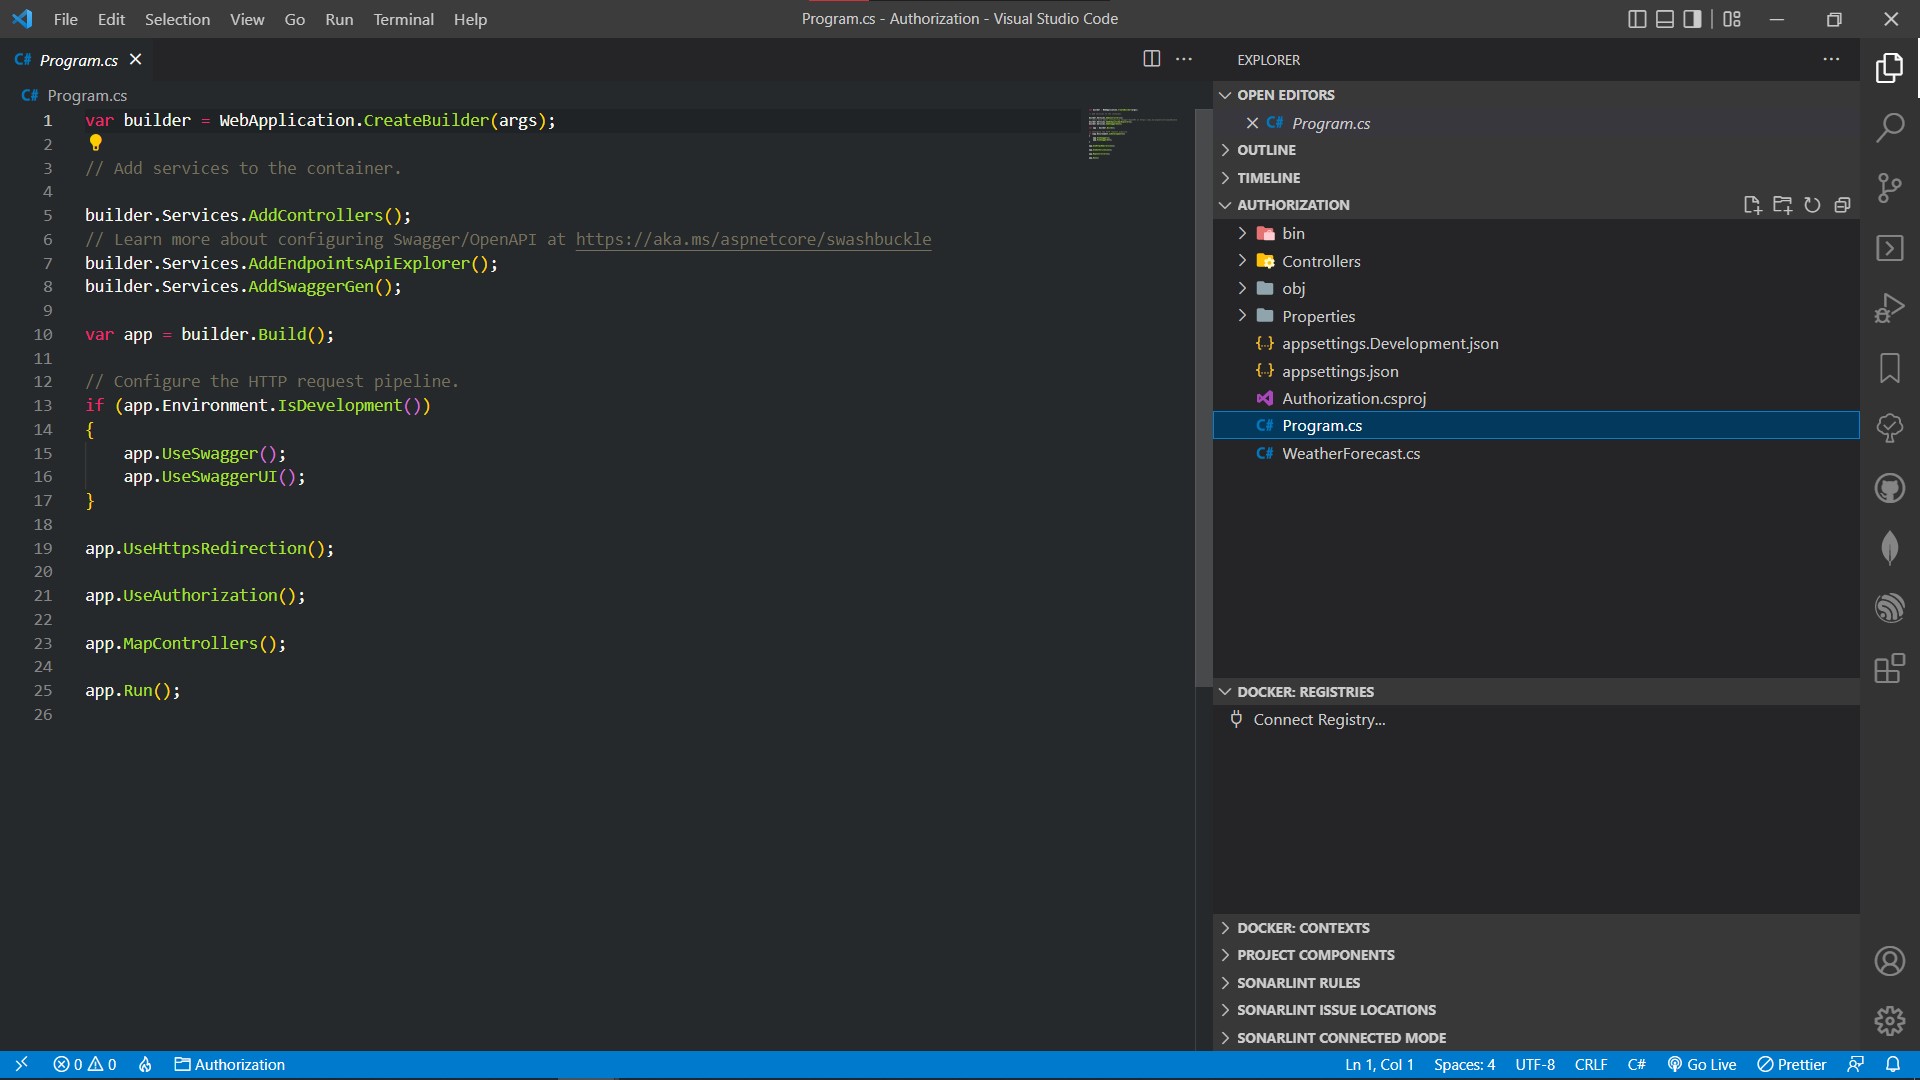
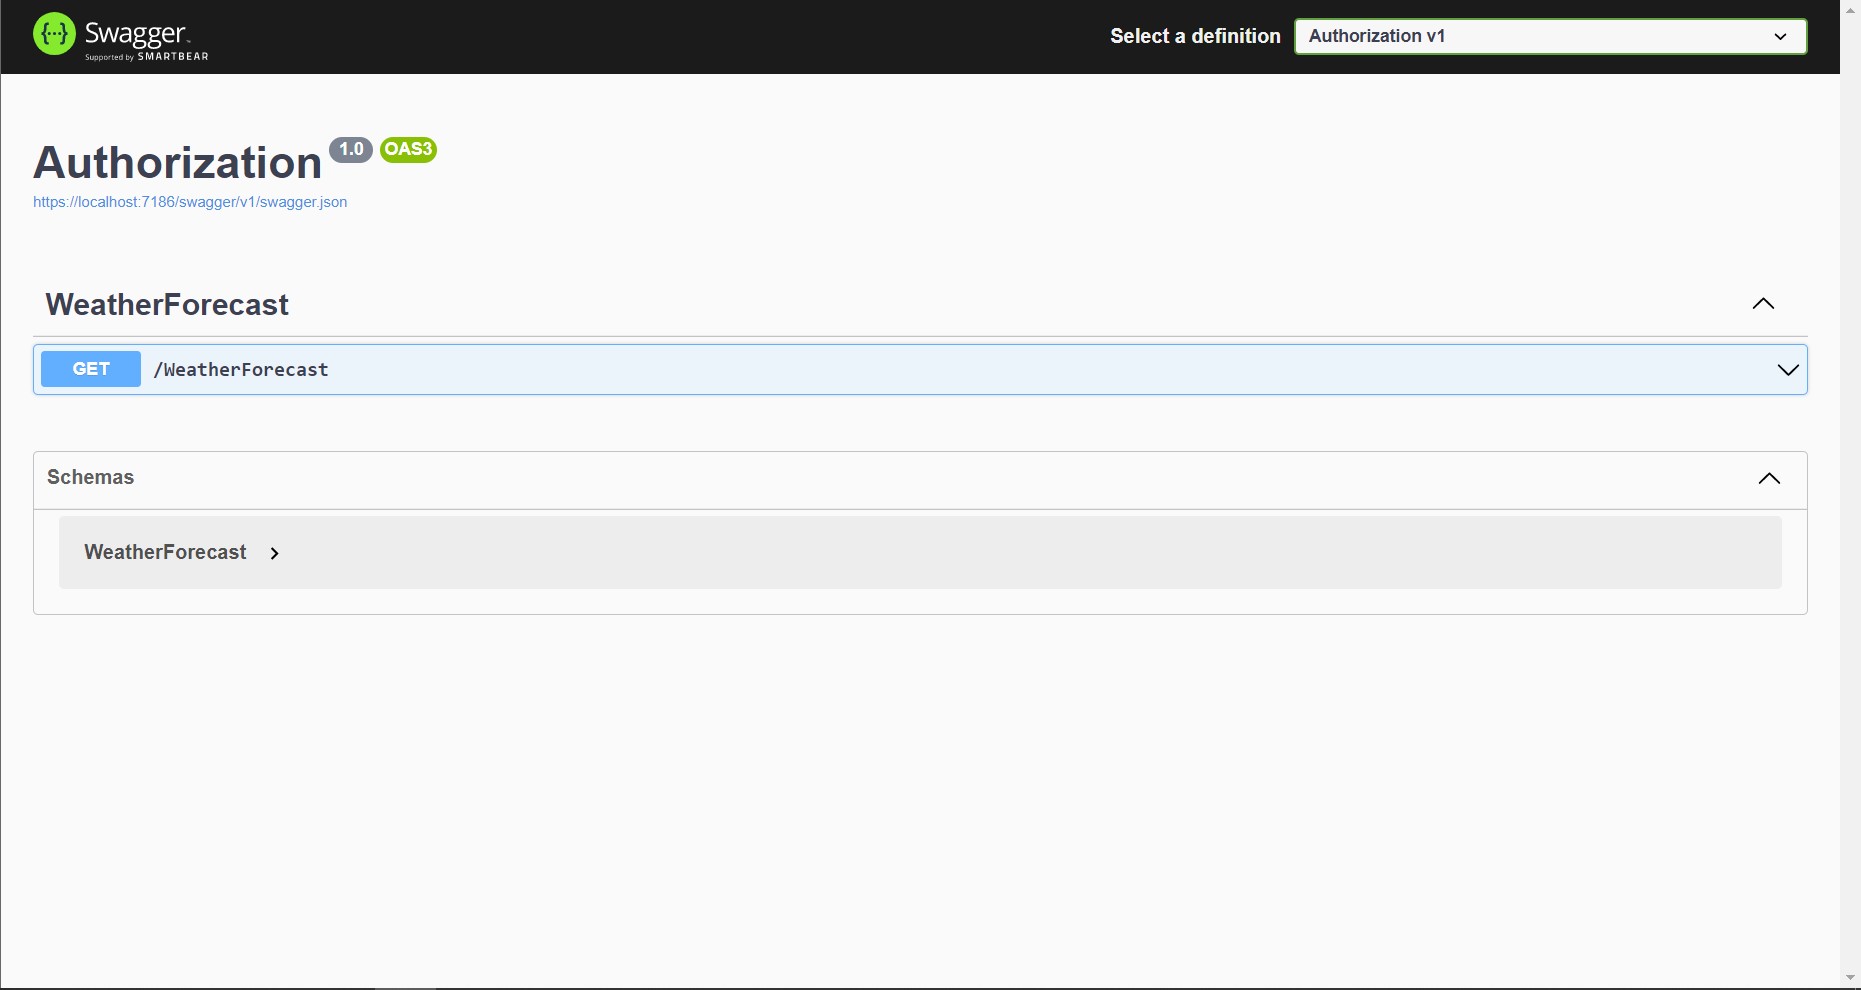
So initially you would get something similar to this.
Run the project with the default template. You would see something like this.
For setting up Authentication refer – Authentication in ASP.NET Core Web API
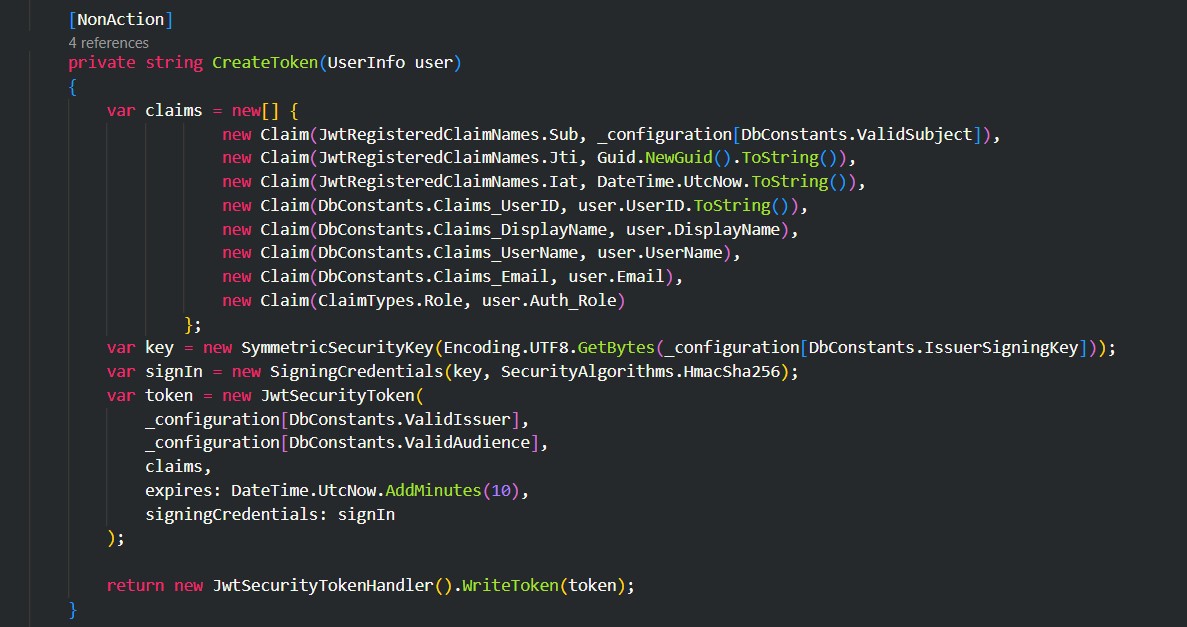
In Controller.cs file add the Role Claim in CreateToken method.
Add Authorize Attribute to the endpoint you want to access based on the Role.

Make sure that the Role Name you configured in Claims and in Authorize Attribute are same. It is a good practice to use Constants where you repeatedly use hardcode strings.
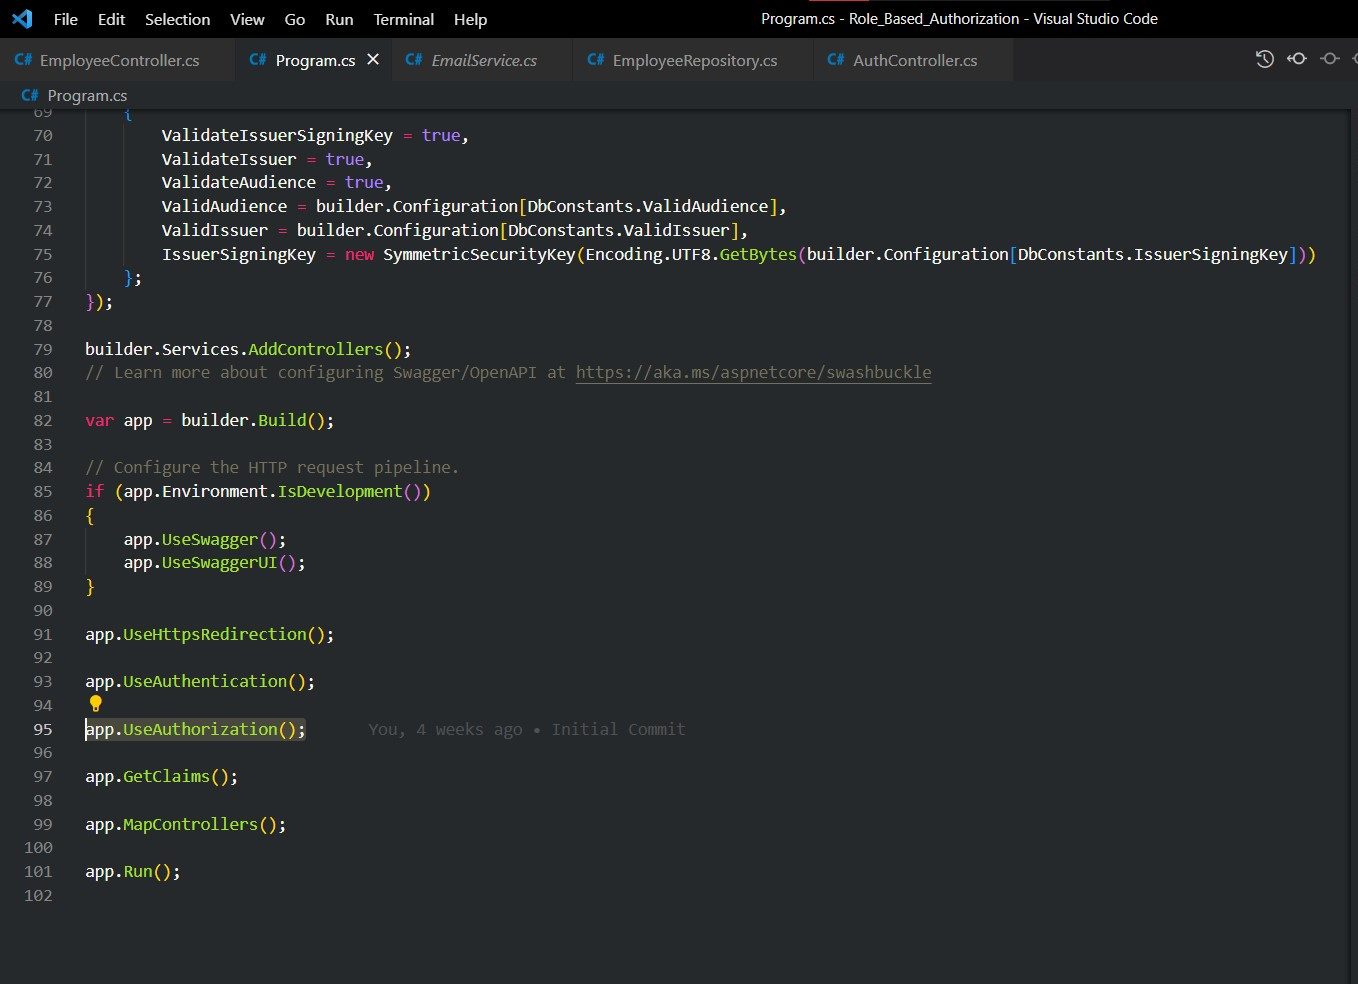
In Program.cs file add the Authorization middleware.
Voila! You have successfully created a Role Based Authorization for your web API.
Summary:
In this Blog, you have learned about Authorization and their types and different approaches. Here you just get to know the basic idea of how and where to implement Authorization. For further understanding feel free to checkout my code on github.
Github Source: https://github.com/edel-rex/Role_Based_Authorization
To know about Git and it’s terminologies check out this blog – Global Information Tracker