Azure Service Bus is a fully managed message broker with message queuing and publish/subscribe topics.
Service bus is used to decouple applications and services from each other’s and supports reliable message queuing and durable publish/subscribe messaging capabilities, some of the core messaging capabilities supported Includes Queues, Topics and Subscriptions.
In this Blog we will see how to get started with Queues in Azure Service Bus and use it from a .Net Application, we will see how to create a queue send messages to the queue, different properties that we can set when send the messages and the using the messages in processing.
Azure Service Bus allows you to build applications that take advantage of asynchronous messaging patterns using a highly reliable service to broker messages between producers and consumers.
Azure Service Bus provides flexible, brokered messaging between client and server, along with structured first-in, first-out (FIFO) messaging, and publish/subscribe capabilities.
Prerequisites for Working with Azure Service Bus:
- Microsoft Azure Subscription:To use Azure services, including Azure Service Bus, you’ll need a subscription.
- Service Bus namespace:To interact with Azure Service Bus, you’ll also need to have a namespace available.
- C#:The Azure Service Bus client library makes use of new features that were introduced in C# Latest Version.
Key concepts
Once we initialized a ServiceBusClient, we can interact with the primary resource types within a Service Bus Namespace,the namespace often serving as an application container:
-
- Queue: Allows for Sending and Receiving of messages.
- Topic: As opposed to Queues, Topics are better suited to publish/subscribe scenarios.
- Subscription: The mechanism to consume from a Topic. Each subscription is independent and receives a copy of each message sent to the topic.
SDK concepts:
- A Service Bus clientis the primary interface for developers interacting with the Service Bus client library.
- A Service Bus sender is scoped to a particular queue or topic, and is created using the Service Bus client.
There are four ways of settling messages:
- Complete – causes the message to be deleted from the queue or topic.
- Abandon – releases the receiver’s lock on the message allowing for the message to be received by other receivers.
- Defer – defers the message from being received by normal means. In order to receive deferred messages, the sequence number of the message needs to be retained.
- DeadLetter – moves the message to the Dead Letter queue. This will prevent the message from being received again.
Sending messages from an Azure Service Bus queue (.NET)
To begin using Service Bus messaging Steps Involved are
- Create a Service Bus namespace, using the Azure portal.
- Create a Service Bus queue, using the Azure portal.
- Design .NET console application to send a set of messages to the queue.
1.Creating a Service Bus namespace, using the Azure portal.
How to implement Service Bus Creating Namespaces that serve as containers for Service Bus Resources in Applications is the first step in creating Entities in the Azure Portal.
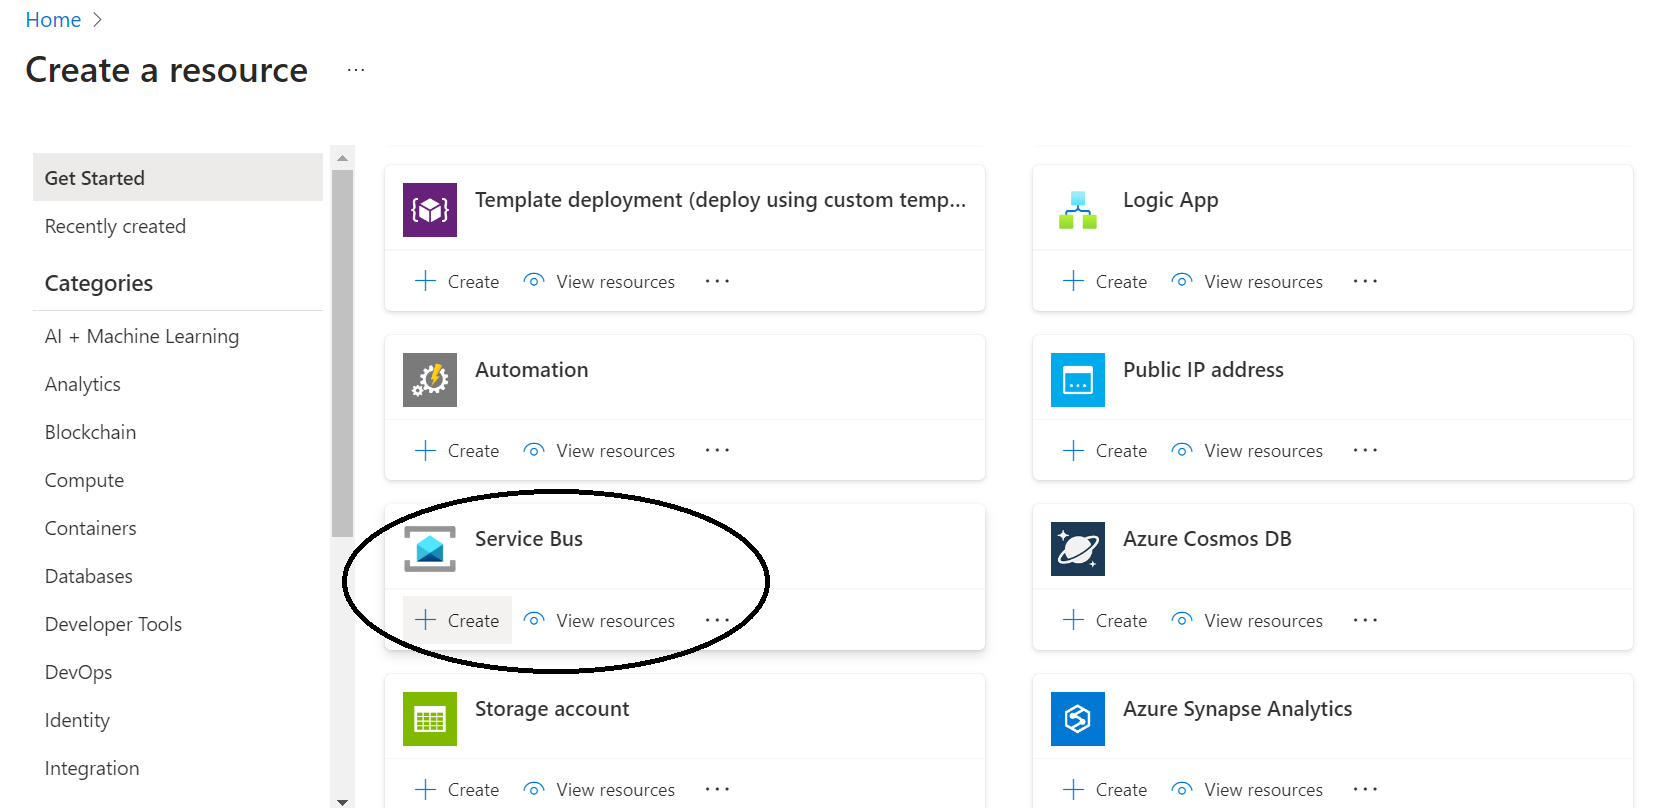
Create Namespace
- Sign in to AzurePortal ->Navigate to Resources -> ServiceBus->Select Create
- In Basic Tag of Create Namespace page Follow these Steps:
- Select an Azure subscription in which to create the namespace under Subscription.
- Select an existing resource group for the namespace to reside in or start a new one under Resource group.
- Give the namespace a name.
- Select the region where your namespace should be hosted under Location.
- Choose the namespace’s pricing tier (Basic, Standard, or Premium) under Pricing tier.
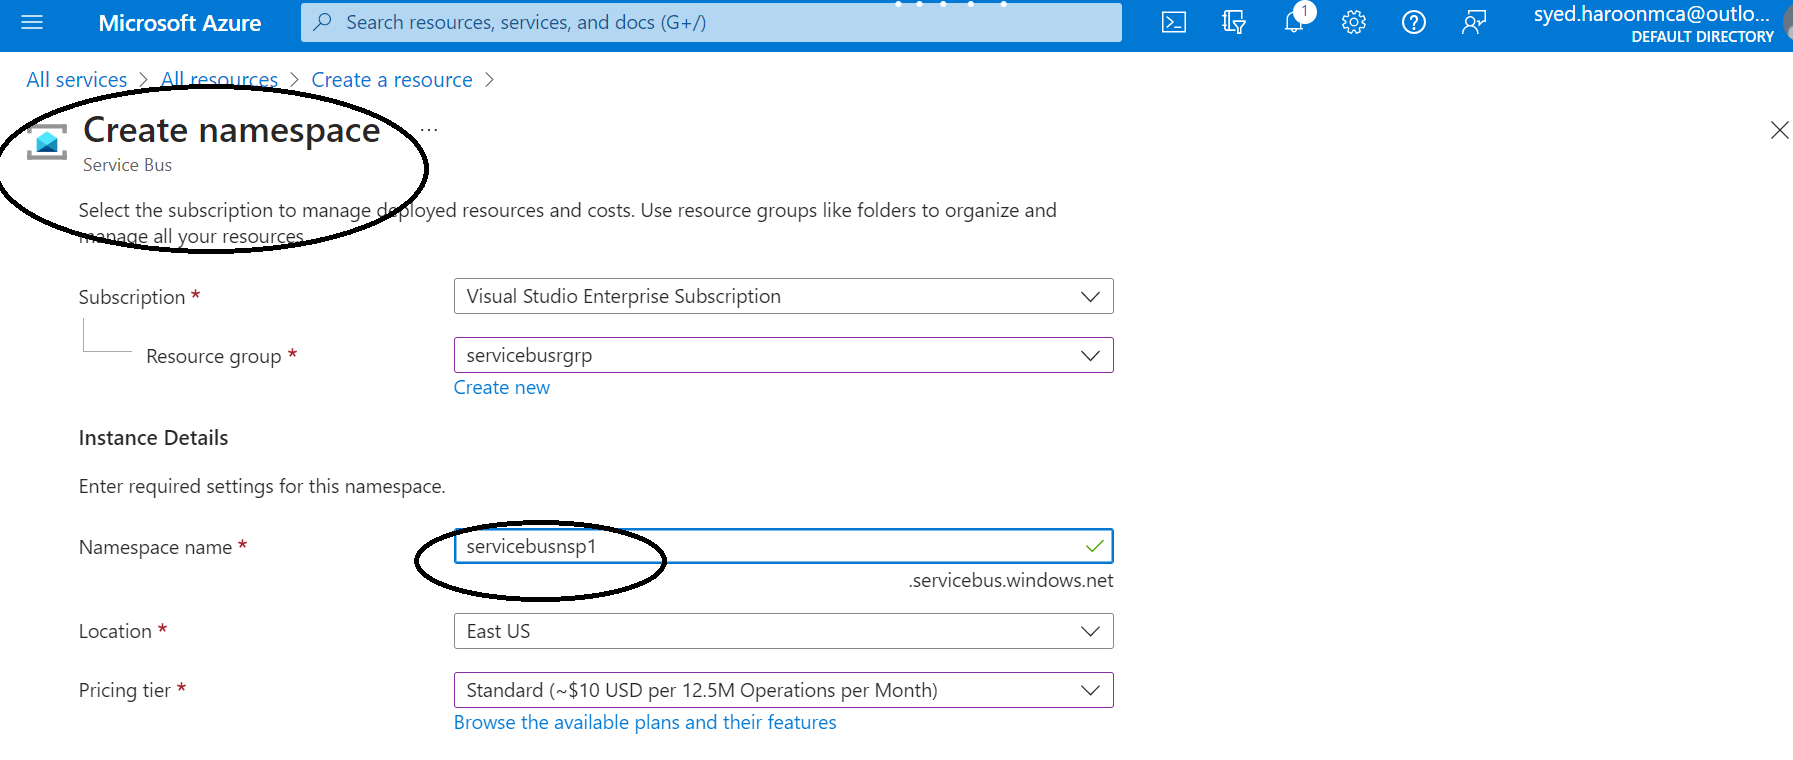
- Choose Review + create from the page’s bottom menu.
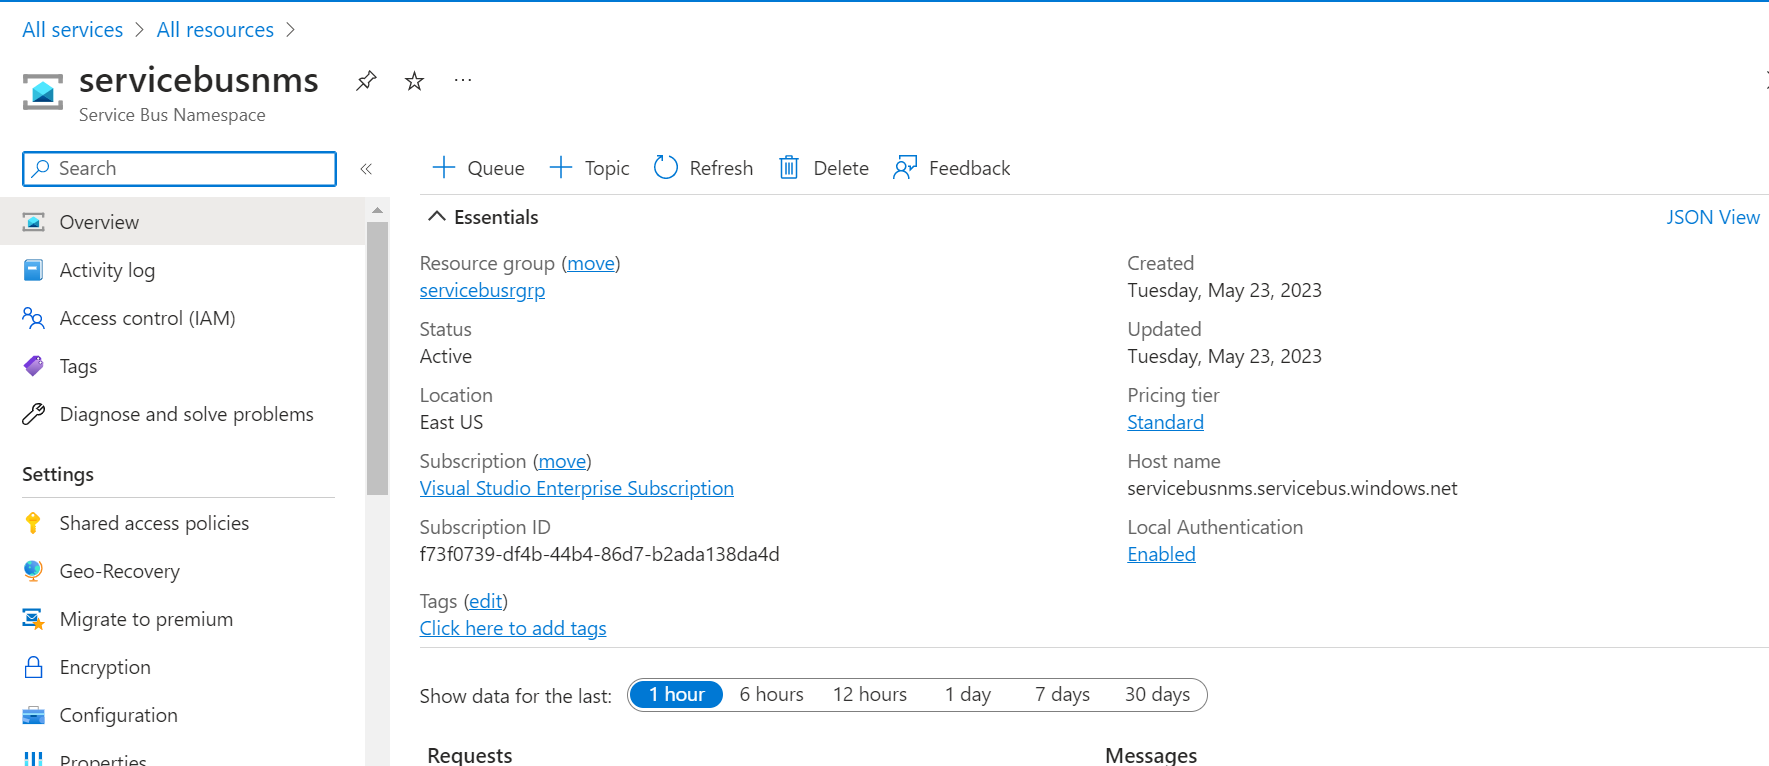
- You see the service bus namespace’s home page.
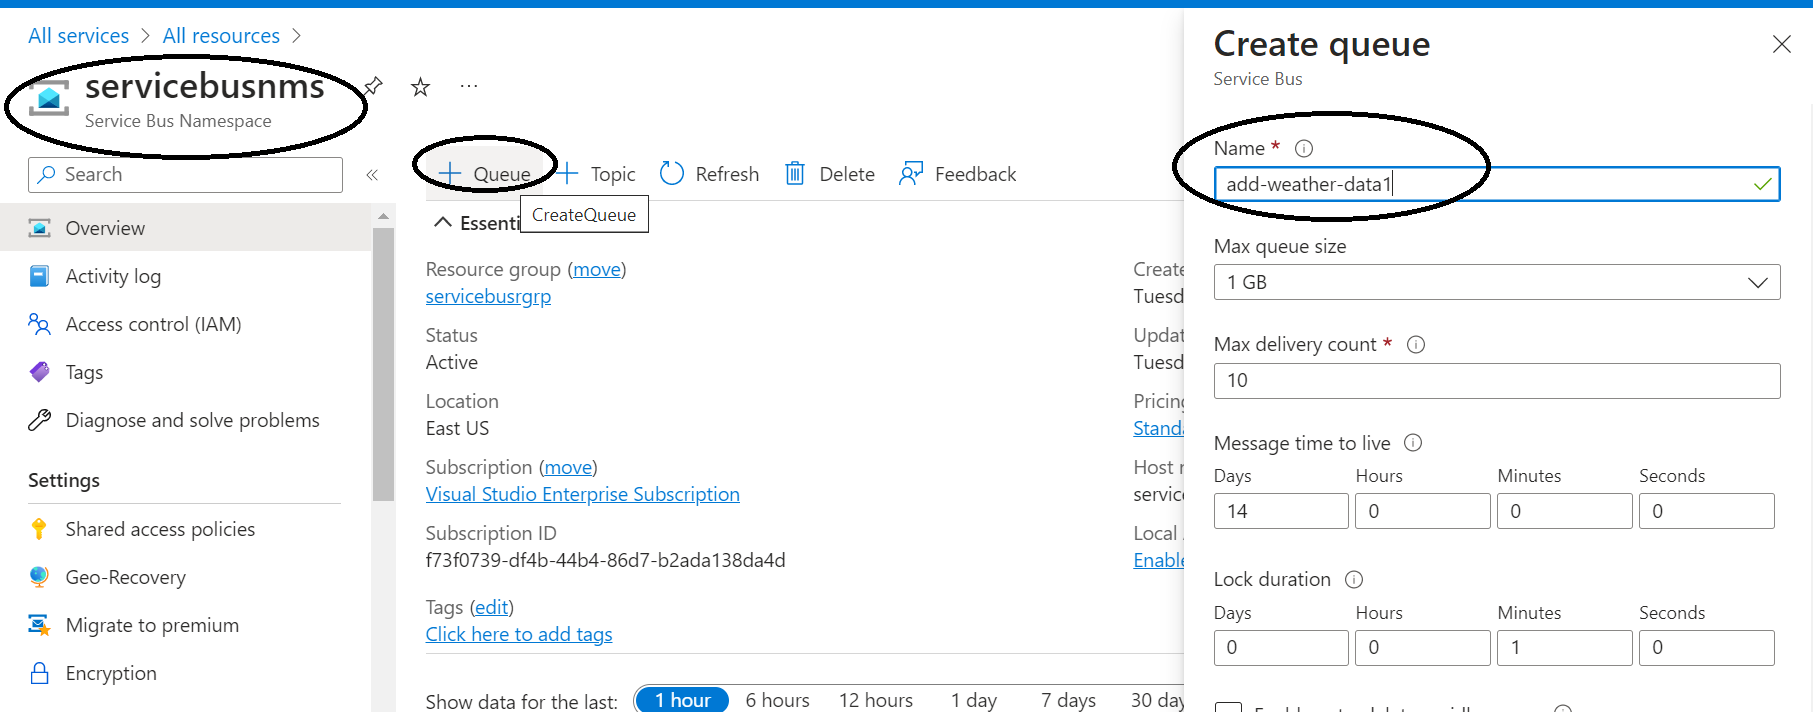
2.Creating a Service Bus queue, using the Azure portal.
- From the left navigation menu on the Service Bus Namespace page, choose Queues.
- Select + Queue from the toolbar on the Queues page.
- Leave the other values at their defaults and give the queue a name.
- Select Create now.
3.Design .NET console application using Visual Code Editor to send a set of messages to the queue.
Create a console application
- Select the File -> New -> Project menu option in Visual Studio.
-
Add the NuGet packages to the project
- Install the Azure.Messaging.ServiceBus NuGet package by running the following command :
Install-Package Azure.Messaging.ServiceBus
- Add code to send messages to the queue using HTTP post method send message to Service Bus Queue.
- Build the project and make sure it’s error-free.
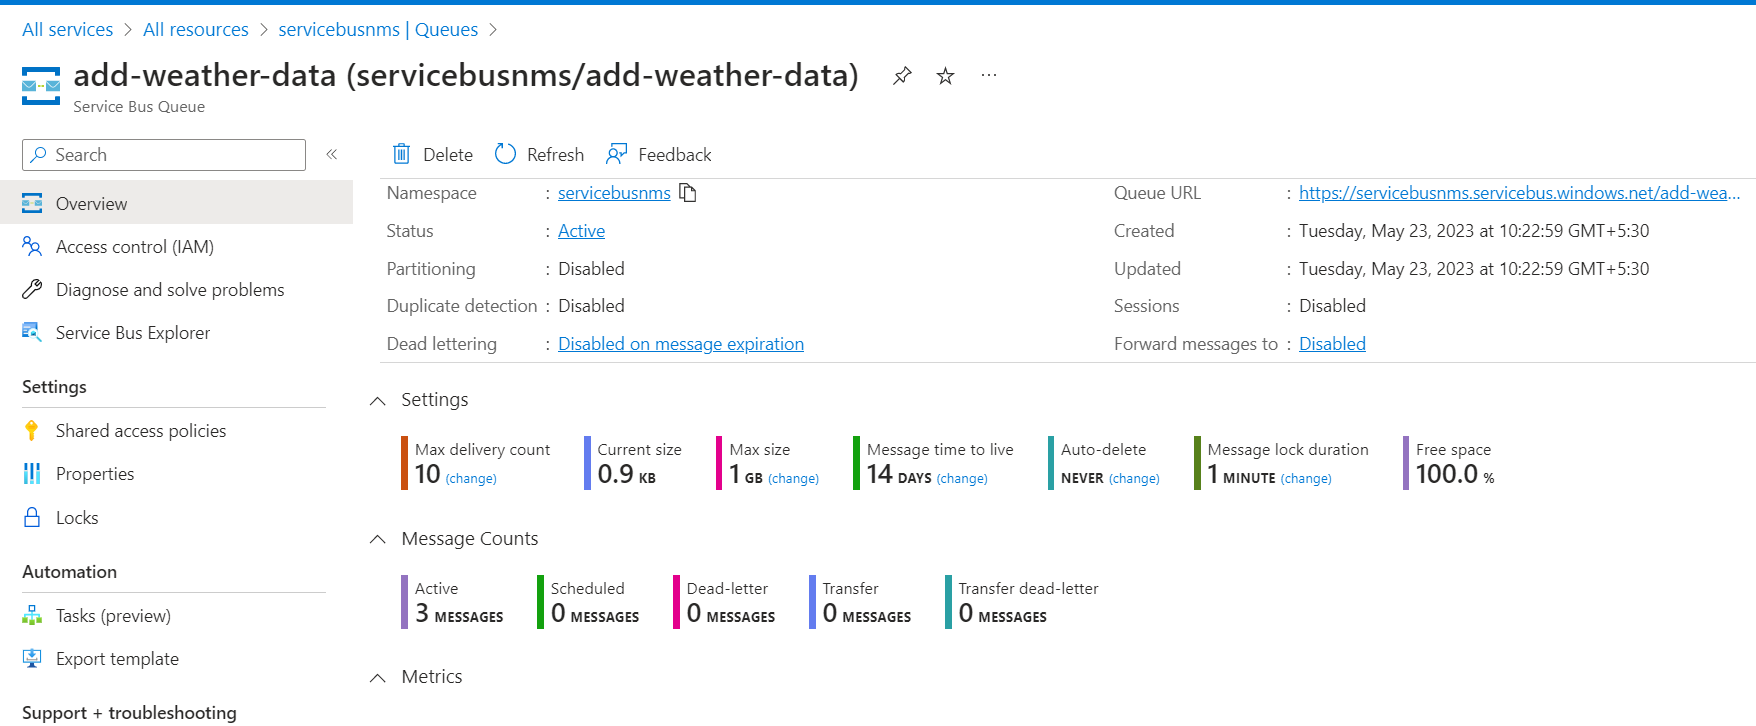
- Re-check the portal. If you don’t see 0 for Active messages after a few minutes, wait a while and refresh the page.
- There are three incoming messages and three outgoing messages for the queue, as shown in the Messages chart in the bottom Metrics section.
Conclusion:
In this Blog we will see how to get started with Queues in Azure Service Bus and use it from a .Net Application, we will see how to create a queue send messages to the queue, different properties that we can set when send the messages and the using the messages in processing.when we process three incoming messages and three outgoing messages for the queue, as shown in the Messages chart in the bottom Metrics section.