Windows PowerShell allows users to access and manage just about every part of the operating system. Some administrative consoles of recent Microsoft server products are simply GUI front-ends for bundled PowerShell commands and scripts which is the power of PowerShell. In this blog, let’s look at the most useful tips that help users while working with Azure PowerShell scripts.
- Connecting to Azure Faster
- Screen Recording
- Faster Editing
- Timestamps for Outputs
- Use PowerShell ISE or Visual Studio Code for Debugging
- Choose commands from the Pallete
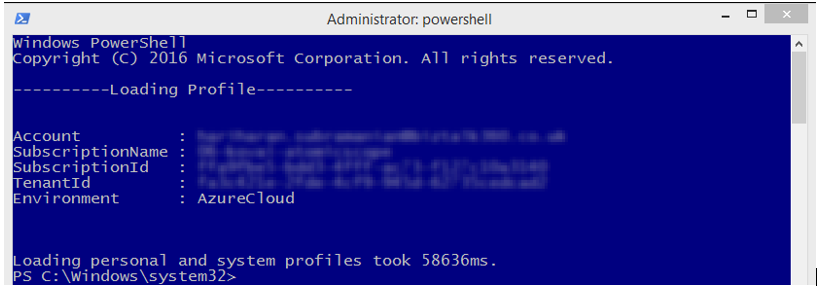
Connecting to Azure Faster by configuring auto-login
Using Windows PowerShell to communicate to the Azure Portal to create and manage resources requires users to log in every time when performing some tasks. We can avoid this by enabling automatic login to Azure. You can also choose the subscription and set it as default in case you have multiple personal or work subscriptions.
Follow below steps to set up an Azure Profile
Note: You need administrative access for performing below the action
- Open Windows PowerShell as an administrator
- Type Notepad $profile
- A notepad file will be opened and here you can paste the below code to log in automatically whenever it is opened.
Write-Host “———-Loading Profile———-“
$username = “”
$password = “”
$securepasswd = ConvertTo-SecureString $password -AsPlainText -Force
$cred = New-Object System.Management.Automation.PSCredential ($username, $ securepasswd)
Connect-AzureRmAccount -Credential $cred
- Save the file and the next time if you start PowerShell, you can see that it will automatically login to the Azure portal
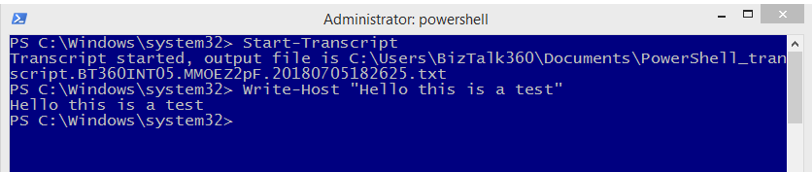
Activity Logging
You have some piece of script that does something. But in case if there are any unexpected errors or warnings during the script execution in the client or user’s machine. If the script is automated and failed in the background we have no clue to find out what has gone wrong. So, PowerShell has a built-in functionality to log whatever the script is doing including error messages and all your console activities can be tracked using Start-Transcript and it will be saved as a text file in the Documents folder.
Faster Editing
If you need to reuse a PowerShell command, don’t waste time retyping it. On the latest version of PowerShell, all your command history is stored automatically. Just keep pressing the Up arrow to view all the commands that you have used previously.
Timestamps for Output
For your PowerShell tasks, you can have a timestamp entered in series, so you can determine how long a single step occurs or to use as a logging mechanism for your scripts. Timestamps are generally used for simple logging mechanism for you to know to exact date|time|second that your command has been executed.
Eg :
Input :
filter timestamp {“$(Get-Date -Format o): $_”}
$result = & ping 192.168.1.1 | timestamp
Output :
2018-18-08T11:42:59.2857205-05:00: Pinging 192.168.1.1 with 32 bytes of data:
2018-18-08T11:43:03.1241043-05:00: Request timed out.
2018-18-08T11:43:08.1236042-05:00: Request timed out.
2018-18-08T11:43:18.1246042-05:00: Ping statistics for 192.168.1.1:
2018-18-08T11:43:18.1246042-05:00: Packets: Sent = 4, Received = 0, Lost = 4 (100% loss),
Command Output example “$(Get-Date -format g)” 6/28/2018 12:41 PM “$(Get-Date -format F)” Thursday, June 28, 2018 12:42:29 PM
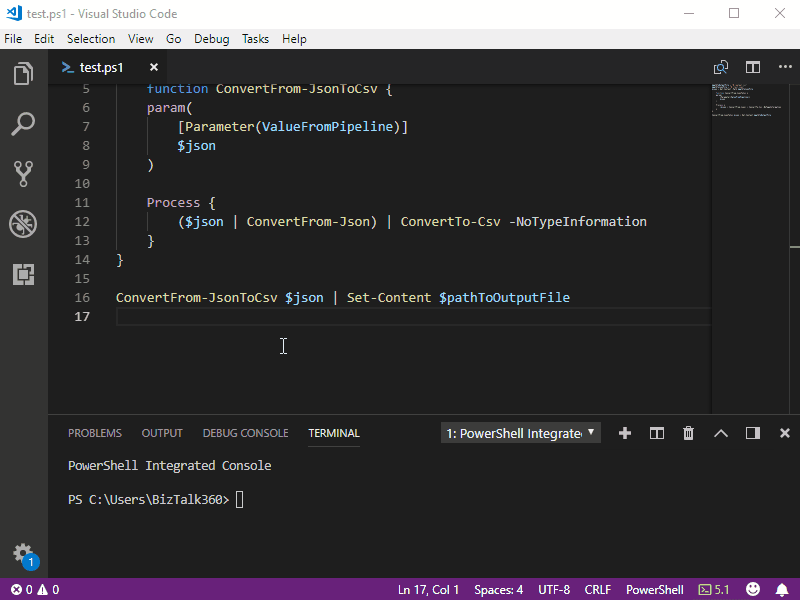
Use PowerShell ISE and Visual Studio Code for Debugging
The original PowerShell console won’t let you debug line by line of your script. For that purpose, you can simply start using PowerShell ISE (Built-in Windows 8 or Later) or VSCode. There are a lot of tools which are very useful. You should install the extension for VSCode for more precise debugging and IntelliSense. It can be found here
Example: Run any single line of code using the F8 key or debug anywhere by having a breakpoint on your script and hit the F5 key.
Choose commands from the palette
Find any set of command for any action that you are about to perform. If you cannot find the cmdlet or keyword just search through the commands pallet in the PowerShell ISE application. If you are not able to see the Commands pallet just click on View- Show Command Add-On
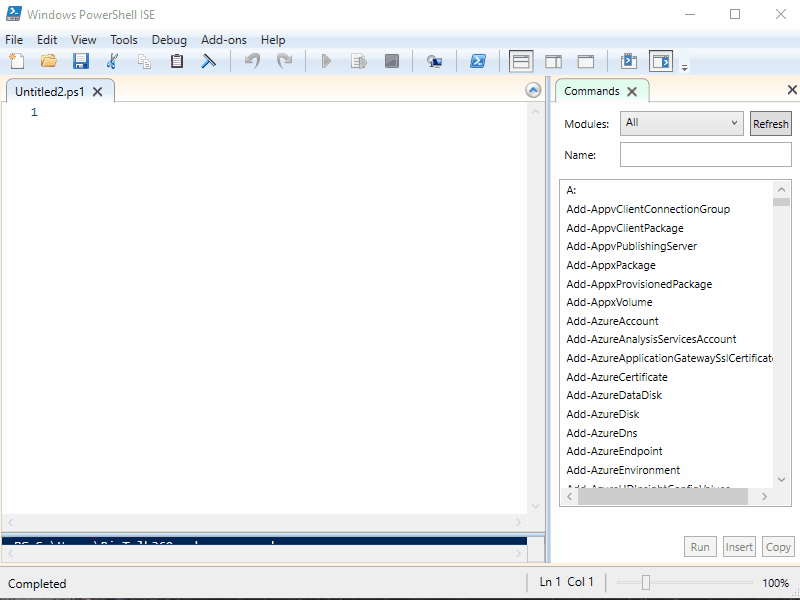
You can also find the list of parameters that a cmdlet support by clicking on the cmdlet from the command window. PowerShell ISE lists the accepted parameters and its type.
Conclusion
With PowerShell anything is possible. You can do a lot more things that you have never thought of. I myself developed a complete Postman alternative with Forms UI which can automatically fetch a list of LogicApps from Azure and you can trigger it from the application.
Please stay tuned for the upcoming events from TechMeet360