API or application program interfaces plays a vital role for business in all industries.
Documentation is a technical content which contains instructions about how to effectively use and integrate with an API.
API Documentation helps own/third-party developer who is your API’s consumer to know about the various endpoint or information available.
Documenting an API becomes simpler ASP.NET Core Web APIs with help of package Swashbuckle.AspNetCore.
What is Swashbuckle.AspNetCore?
It’s a swagger tool for APIs built with ASP.NET Core.
You can create documentation for your API Project in simple steps with the help of Swashbuckle.AspNetCore package.
It generates API documentation including UI to explore and test the API endpoints with sample input sets or templates.
The documentation is generated based on your controller, models, and routes available in API.
In addition to its Swagger generator, Swashbuckle also provides an embedded version of the awesome swagger-ui that’s powered by the generated Swagger JSON.
This means you can complement your API with living documentation that’s always in sync with the latest code.
Let’s build an API
Let’s create an API project with the help of dotnet CLI. To start building .NET apps you need to download and install the .NET SDK – Software Development Kit.
Create an API project under a new folder (example, APIDocumentation) using the following command in the command prompt:
dotnet new api
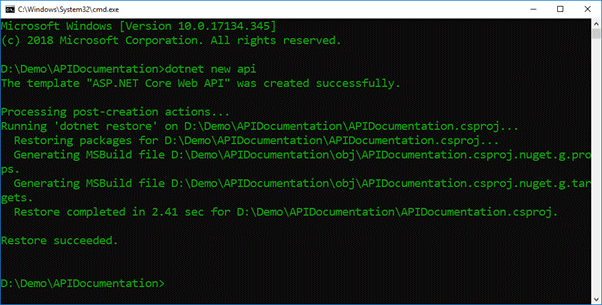
Once you have run the command, the API gets created with a sample controller called ValueController.
namespace APIDocumentation.Controllers
{
    [Route("api/[controller]")]
    [ApiController]
    public class ValuesController : ControllerBase
    {
        // GET api/values
        [HttpGet]
        public ActionResult<IEnumerable<string>> Get()
        {
            return new string[] { "value1", "value2" };
        }

        // GET api/values/5
        [HttpGet("{id}")]
        public ActionResult<string> Get(int id)
        {
            return "value";
        }

        // POST api/values
        [HttpPost]
        public void Post([FromBody] string value)
        {
        }

        // PUT api/values/5
        [HttpPut("{id}")]
        public void Put(int id, [FromBody] string value)
        {
        }

        // DELETE api/values/5
        [HttpDelete("{id}")]
        public void Delete(int id)
        {
        }
    }
}
Getting started with Swashbuckle.AspNetCore
Your API is ready now to add documentation package. Install the standard package of Swashbuckle.AspNetCore into your ASP.NET Core application.
dotnet add package Swashbuckle.AspNetCore

Restore the package dependencies using the following command
dotnet restore
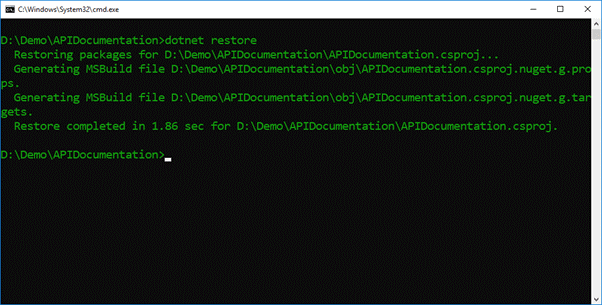
Once you have run the restore command, the CLI will install all the project dependencies under the directory.
Configuring the documentation
Consequently, in the next step, you have to register the swagger generator in the configuration service.
For that, you need to add the following code in startup.cs under ConfigureServices and add using Swashbuckle.AspNetCore.Swagger; in directives.
		 services.AddSwaggerGen(c =>
         {
             c.SwaggerDoc("v1", new Info { Title = "My API", Version = "v1" });
         });
By default, your API actions and non-route parameters are decorated with explicit “Http” and “From” bindings.
If it’s not available, we must add those bindings in our API.
Example
		 [HttpGet]
         public ActionResult<IEnumerable<string>> Get()
         {
           return new string[] { "value1", "value2" };
         }
Next, in the Configure method, you must insert middleware to expose the generated Swagger as JSON endpoint(s) like below,
		 app.UseSwagger();
         app.UseSwaggerUI(c =>
         {
             c.SwaggerEndpoint("/swagger/v1/swagger.json", "My API V1");
         });
Exposing your application with ApiExplorer
One of the standard services added when you call AddMvc() in an ASP.NET Core application is ApiExplorer.
Swashbuckle relies heavily on ApiExplorer, the API metadata layer that ships with ASP.NET Core.
The ApiExplorer contains the functionality of discovering and exposing metadata about your application.
It provides details such as controller & action list, URLs, HTTP methods and parameters.
If you’re using the AddMvc helper in the startup.cs, the ApiExplorer will be automatically registered and starts exposing API metadata.
However, if you’re using AddMvcCore for a more paired-down MVC stack, you’ll need to explicitly add the API Explorer service:
services.AddMvcCore().AddApiExplorer();
We have completed all the steps that we need to set up a basic API documentation of swagger. Now you can run the application and visit the documentation.
You can run the application using the following CLI command
dotnet run

The application will start running and the endpoint information will get displayed in the command prompt.
We shall visit the documentation page using the link,
<<endpoint>>/swagger
Example
Here, our application is running in localhost:5001. So, we can visit https://localhost:5001/swagger to visit our API documentation.
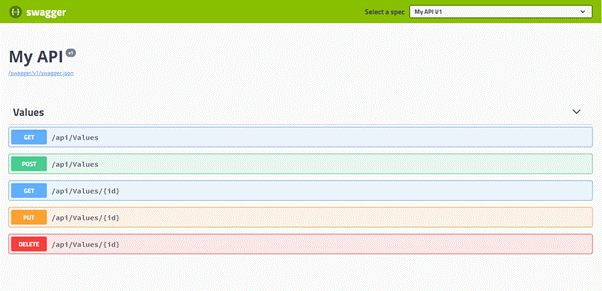

Based on our Controller and Http methods, our documentation has been generated. We can extend documentation further based on our needs.
Please, try out the steps mentioned to create API documentation and leave your kind feedback in the comment section.
Happy Coding!